Honeywell Pro 8000 Manual: A Comprehensive Guide
Welcome! This guide details installation‚ operation‚ and maintenance of your Honeywell Pro 8000. It covers installer options‚ Wi-Fi setup‚ and remote access features.
Congratulations on selecting the Honeywell Pro 8000! This smart thermostat offers advanced control over your home’s heating and cooling systems‚ designed for optimal comfort and energy savings. This manual serves as a comprehensive resource‚ guiding you through every step – from initial installation to daily operation and advanced feature utilization.
The Pro 8000 series is engineered for ease of use‚ featuring an intuitive user interface and compatibility with RedLink wireless sensors. Whether you’re a homeowner or a professional installer‚ this guide provides clear‚ concise instructions. You’ll learn how to properly mount the wallplate‚ establish secure Wi-Fi network connections‚ and program customized schedules to suit your lifestyle.

Furthermore‚ we’ll explore troubleshooting tips and the factory reset procedure‚ ensuring a smooth and efficient experience. Refer to the installation guide and the user’s guide for detailed information. This manual will empower you to maximize the potential of your new Honeywell thermostat.
Understanding the Pro 8000 Series
The Honeywell Pro 8000 series represents a significant advancement in home comfort technology. It’s more than just a thermostat; it’s a smart home hub designed to optimize energy usage and provide unparalleled control. Key models‚ like the TH8320R VisionPro 8000‚ boast a vibrant touchscreen display and intuitive navigation.
A core feature is its compatibility with RedLink wireless sensors‚ allowing for whole-home temperature monitoring and zoning. This enables precise heating and cooling in specific areas‚ eliminating wasted energy. The system supports various HVAC configurations‚ adapting to your existing setup. The thermostat’s MAC and CRC addresses are crucial during registration‚ accessible via the user’s guide.
Understanding the series involves recognizing its modular design – the wallplate separates from the thermostat for simplified installation. Optimal RedLink performance requires a minimum distance of two feet between thermostats. The Pro 8000 integrates seamlessly with Honeywell’s ecosystem‚ offering a connected and convenient experience.
Key Features and Benefits
The Honeywell Pro 8000 delivers a wealth of features designed for comfort‚ convenience‚ and cost savings. Its high-resolution touchscreen provides a clear and responsive user interface‚ simplifying programming and adjustments. Wi-Fi connectivity enables remote access and control via a smartphone or tablet‚ allowing you to manage your home’s temperature from anywhere.
RedLink wireless sensor compatibility extends the system’s capabilities‚ enabling multi-zone control and improved temperature accuracy. Smart scheduling learns your habits and automatically adjusts settings to optimize energy efficiency. The system’s ability to adapt to various HVAC systems ensures broad compatibility.
Benefits include reduced energy bills‚ enhanced home comfort‚ and increased control over your indoor environment. Easy installation‚ coupled with a comprehensive user guide‚ makes setup straightforward. Features like date and time setting‚ and installer options‚ further customize the experience. The Pro 8000 truly elevates home climate management.

Installation Process
Begin by carefully unboxing components and verifying all parts are present. This guide details wallplate installation‚ wiring connections‚ and thermostat attachment for a seamless setup.
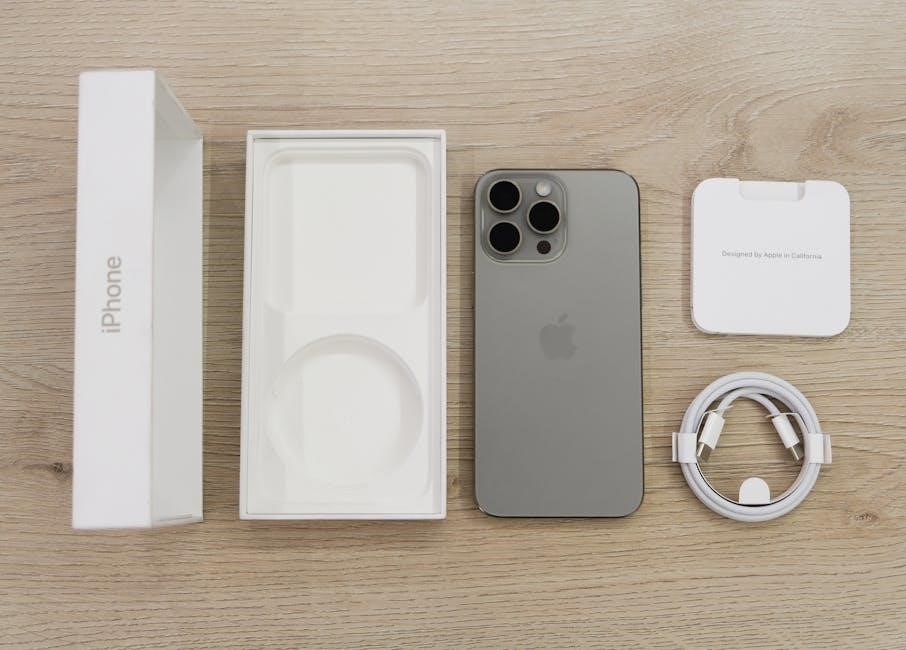
Unboxing and Component Check
Upon receiving your Honeywell Pro 8000‚ carefully open the packaging and lay out all included components. Verify the presence of the thermostat unit itself‚ the detachable wallplate‚ mounting screws‚ wire labels‚ and the comprehensive installation guide.
Inspect each item for any signs of physical damage that may have occurred during shipping. Ensure the thermostat screen is intact and the wallplate is free from cracks or bends. The screw pack should contain the appropriate number and type of screws for secure mounting.
Confirm the installation guide matches the model number of your thermostat. Note the Thermostat MAC and CRC‚ as these will be needed during registration on Honeywell.com/TCC. A missing component or damaged part should be reported to the retailer immediately before proceeding with the installation.
Wallplate Installation
Begin by carefully separating the wallplate from the main thermostat unit. Choose a suitable location for mounting‚ ensuring it’s away from direct sunlight‚ drafts‚ and other sources of temperature interference. Use a level to guarantee a straight installation.
Mark the screw holes on the wall using the wallplate as a template. Drill pilot holes if necessary‚ depending on your wall material. Securely mount the wallplate to the wall using the provided screws. Ensure it is firmly attached and doesn’t wobble.
Before proceeding‚ double-check the wallplate is level and properly aligned. For optimal RedLink performance‚ maintain a distance of at least two feet between thermostats. This step is crucial for a stable and accurate installation‚ setting the foundation for proper system operation.
Mounting the Wallplate
Prior to mounting‚ verify the chosen location is free from obstructions and allows for easy wiring access. Utilize the provided screws‚ appropriate for your wall type – drywall anchors may be necessary for secure installation on drywall. Align the wallplate with the pre-drilled pilot holes‚ ensuring it’s perfectly level for accurate temperature readings.
Carefully screw the wallplate into the wall‚ tightening each screw gradually and evenly. Avoid over-tightening‚ which could damage the wallplate or the wall itself. A snug fit is sufficient to hold the wallplate securely in place. Double-check for stability; it shouldn’t wobble or feel loose.
Confirm the wallplate is flush against the wall and properly oriented. This ensures the thermostat will attach correctly and function optimally. A correctly mounted wallplate is fundamental for a successful and long-lasting Honeywell Pro 8000 installation.
Wiring Connections
Before commencing wiring‚ ALWAYS disconnect power to your HVAC system at the breaker to prevent electrical shock. Identify the existing wiring connected to your old thermostat‚ carefully labeling each wire for accurate reconnection. Refer to the Honeywell Pro 8000 wiring diagram in the installation guide for correct terminal assignments.
Connect each labeled wire to the corresponding terminal on the wallplate‚ ensuring a secure connection. Gently tug on each wire to confirm it’s firmly seated. Common terminals include Rh‚ Rc‚ W‚ Y‚ G‚ and C (common wire). The ‘C’ wire is crucial for consistent power and optimal performance.
Double-check all wiring connections against the diagram before restoring power. Incorrect wiring can damage the thermostat or your HVAC system. If you are uncomfortable with electrical wiring‚ consult a qualified HVAC technician for assistance. Proper wiring is essential for reliable operation.
Thermostat Attachment
Once the wallplate is securely mounted and all wiring connections are verified‚ carefully align the Honeywell Pro 8000 thermostat with the wallplate. Gently push the thermostat onto the wallplate until it clicks into place‚ ensuring a snug and secure fit. Do not force it; if it doesn’t align easily‚ re-check the wiring and wallplate mounting.
Verify that the thermostat is firmly attached and doesn’t wobble. A loose connection can cause intermittent operation or display issues. The thermostat should sit flush against the wall. Ensure no wires are pinched or damaged during the attachment process.
After attachment‚ visually inspect the connections one last time through the thermostat’s access points‚ if available. This final check helps prevent potential issues before powering on the system. A secure attachment is vital for both functionality and aesthetics.
Initial Power-Up and Setup
After securely attaching the thermostat‚ restore power to the HVAC system at the breaker. The Honeywell Pro 8000 should power on automatically‚ displaying the welcome screen. Allow a few moments for the system to initialize and perform self-tests. The initial setup wizard will guide you through essential configurations.
The wizard will prompt you to select your system type (heating‚ cooling‚ or heat pump). Accurate selection is crucial for proper operation. You may also be asked to confirm wiring configurations. Follow the on-screen instructions carefully. Note the Thermostat MAC and CRC during this process; they’re needed for registration.
Register your thermostat at Honeywell.com/TCC for warranty and support benefits. The setup process also includes options for connecting to Wi-Fi‚ which enables remote access and control. Ensure a stable Wi-Fi connection for optimal performance.
System Configuration
Configure your Honeywell Pro 8000 with installer options‚ date/time settings‚ and Wi-Fi connectivity. These steps personalize the system for optimal performance.
Installer Options
Accessing Installer Options is crucial for tailoring the Honeywell Pro 8000 to specific system requirements. These settings‚ typically hidden from everyday users‚ allow professionals to fine-tune the thermostat’s behavior. To enter the installer mode‚ a specific sequence of button presses is required – consult the full manual for the exact procedure‚ as it can vary slightly depending on the model.
Within Installer Options‚ you’ll find settings for system type (heat pump‚ forced air‚ etc.)‚ anticipator settings‚ cycle rate adjustments‚ and temperature offset calibration. Proper configuration of these parameters ensures accurate temperature control and efficient operation. Pay close attention to the wiring configuration during setup‚ as incorrect wiring can lead to inaccurate readings and system malfunctions.
Important Note: Incorrectly adjusting Installer Options can negatively impact system performance. It’s recommended that only qualified HVAC technicians modify these settings. Always document any changes made for future reference and troubleshooting. The MAC and CRC addresses‚ noted during setup‚ are vital for registration and potential remote diagnostics.
Setting Date and Time
Accurate date and time settings are fundamental for proper scheduling and operation of your Honeywell Pro 8000 thermostat. Incorrect time can disrupt programmed schedules‚ leading to inefficient heating or cooling. The initial setup process will prompt you to configure these settings‚ but they can be adjusted later through the thermostat’s menu system.
Navigate to the settings menu using the touchscreen interface. Look for options labeled “Date‚” “Time‚” or “Clock.” You’ll typically be able to adjust these parameters manually‚ or‚ if the thermostat is connected to Wi-Fi‚ it may automatically synchronize with a network time server. Automatic synchronization is recommended for maintaining accuracy.
Important Considerations: Ensure the correct time zone is selected. Double-check the date and time after setting to avoid errors. If you experience persistent issues with time synchronization‚ verify your Wi-Fi connection and consult the troubleshooting section of this manual. Proper timekeeping is essential for maximizing the benefits of your programmable thermostat.
Wi-Fi Network Connection
Connecting your Honeywell Pro 8000 to a Wi-Fi network unlocks remote control capabilities and enables automatic software updates. To initiate the connection‚ access the network settings within the thermostat’s menu. The thermostat will scan for available networks; select yours from the list. You’ll be prompted to enter your network password using the touchscreen interface.
Security Protocols: The thermostat supports common Wi-Fi security protocols like WPA and WPA2. Ensure your router is broadcasting on a 2.4 GHz frequency‚ as the Pro 8000 may not be compatible with 5 GHz networks. A strong and stable Wi-Fi signal is crucial for reliable performance.
Troubleshooting: If the connection fails‚ verify the password‚ check your router’s settings‚ and ensure the thermostat is within range of the Wi-Fi signal. Refer to the Honeywell website for additional support and FAQs. Successful Wi-Fi connection is key to utilizing the full potential of your smart thermostat.

Operating the Honeywell Pro 8000

Explore intuitive controls‚ program schedules‚ and utilize various temperature modes. Enjoy remote access via the Honeywell app for convenient home comfort management.
Navigating the User Interface
The Honeywell Pro 8000 boasts a user-friendly interface designed for effortless control. Upon powering up‚ you’ll be greeted by a clear‚ backlit display presenting current temperature and system status. Utilize the intuitive touchscreen or physical buttons – depending on the model – to access various menus.
The main screen typically showcases the current mode (Heat‚ Cool‚ Auto‚ Off)‚ set temperature‚ and time. Swiping or tapping allows navigation to scheduling options‚ system settings‚ and advanced features. A dedicated menu provides access to installer settings‚ requiring a passcode for security.
Familiarize yourself with the icons representing different functions; a snowflake indicates cooling‚ a flame signifies heating‚ and a fan symbol controls airflow. The interface also displays Wi-Fi connectivity status and battery levels for wireless sensors. Detailed explanations of each function are available within the on-screen help section‚ ensuring a smooth and intuitive user experience. Remember to consult the full manual for a comprehensive overview.
Programming Schedules
The Honeywell Pro 8000 allows for highly customizable scheduling to optimize comfort and energy savings. Access the scheduling menu through the main interface to create personalized programs tailored to your lifestyle. You can define different temperature settings for various time periods throughout the day‚ such as Wake‚ Leave‚ Return‚ and Sleep.
The system supports seven-day programming‚ enabling unique schedules for weekdays and weekends. Alternatively‚ utilize the “5-1-1” day programming option for a simplified setup. Each time period can be individually adjusted for both heating and cooling temperatures. The interface provides a clear visual representation of your schedule‚ making it easy to identify and modify settings.
Consider utilizing the “Smart Response” feature‚ which learns your heating and cooling patterns to proactively adjust temperatures for optimal comfort. Remember to save your changes after each modification. Detailed instructions and examples are available in the complete manual to guide you through the scheduling process.
Temperature Control Modes
The Honeywell Pro 8000 offers several temperature control modes to suit your needs. Heat mode activates the heating system to maintain the set temperature. Cool mode engages the cooling system for temperature reduction. Auto mode intelligently switches between heating and cooling to maintain your desired comfort level‚ based on indoor and outdoor temperatures.
Off mode disables both heating and cooling systems. The Emergency Heat mode bypasses normal operation and relies solely on auxiliary heat‚ useful during heating system failures. You can easily select your preferred mode directly from the thermostat’s main screen. The system also features a Hold function‚ allowing you to temporarily override the programmed schedule and maintain a constant temperature.
Explore the “Fan” settings to choose between Auto (fan runs only during heating/cooling) and On (fan runs continuously). Understanding these modes allows for precise control over your home’s climate and energy consumption. Refer to the full manual for detailed explanations and troubleshooting tips.
Remote Access and Control
The Honeywell Pro 8000 provides convenient remote access and control via the Honeywell Home app‚ available for iOS and Android devices. After connecting your thermostat to your Wi-Fi network‚ you can monitor and adjust the temperature from anywhere with an internet connection. This feature allows for energy savings by adjusting settings while away from home.
Through the app‚ you can view current temperatures‚ change modes (Heat‚ Cool‚ Auto‚ Off)‚ and modify programmed schedules. Receive alerts for extreme temperatures or system malfunctions directly on your smartphone. The app also supports multiple user accounts‚ granting family members access and control.
Ensure your thermostat is registered on Honeywell.com/TCC for full functionality. Remote access enhances convenience and provides peace of mind‚ allowing you to maintain a comfortable home environment regardless of your location. Detailed instructions for app setup are available in the complete manual.

Advanced Features
Explore RedLink sensor compatibility‚ energy-saving strategies‚ and troubleshooting tips. A factory reset procedure is also included for restoring default settings quickly.
RedLink Wireless Sensor Compatibility
Honeywell’s RedLink technology enables seamless communication with wireless sensors‚ expanding the capabilities of your Pro 8000 thermostat. These sensors allow for temperature monitoring in multiple zones throughout your home‚ providing more consistent and comfortable heating and cooling. For optimal performance‚ ensure sensors are mounted at least two feet apart‚ avoiding obstructions that could interfere with the wireless signal.
Adding RedLink sensors is straightforward through the thermostat’s menu. The system automatically recognizes and pairs with compatible sensors‚ simplifying the setup process. You can assign sensors to specific rooms or zones‚ tailoring temperature control to your individual needs. This feature is particularly useful for homes with uneven heating or cooling‚ or for rooms that are rarely used.
The Pro 8000 supports a variety of RedLink sensors‚ including temperature‚ humidity‚ and motion sensors. Refer to the thermostat’s user guide for a complete list of compatible devices. Utilizing these sensors can significantly improve energy efficiency and enhance your overall home comfort experience.
Energy Saving Tips
Maximize your savings with the Honeywell Pro 8000! Utilize the programmable scheduling feature to automatically adjust temperatures when you’re asleep or away from home. Lowering the thermostat by just 7-10 degrees for eight hours can reduce heating costs significantly. Take advantage of the geofencing capabilities‚ if available‚ to adjust temperatures based on your location.
Consider pairing your thermostat with RedLink wireless sensors to optimize temperature distribution throughout your home‚ avoiding unnecessary heating or cooling in unoccupied rooms. Regularly check and replace air filters to ensure efficient system operation. A dirty filter forces your HVAC system to work harder‚ consuming more energy.
Explore the thermostat’s energy reports to identify patterns and opportunities for further savings. Small adjustments to your schedule and temperature settings can add up to substantial reductions in your energy bills. Remember to utilize the thermostat’s learning features‚ if equipped‚ to automatically optimize energy usage based on your habits.
Troubleshooting Common Issues

No Power: Verify the circuit breaker hasn’t tripped. Ensure the thermostat is securely attached to the wallplate. Check wiring connections for looseness. Wi-Fi Connectivity: Confirm your router is functioning and broadcasting a signal. Double-check the entered password. Try restarting both the thermostat and your router.
Incorrect Temperature Readings: Ensure the thermostat isn’t exposed to direct sunlight or drafts. Calibrate the temperature sensor within the settings menu. Verify RedLink sensors are communicating correctly if used. Display Issues: Try resetting the thermostat. If the screen remains unresponsive‚ contact Honeywell support.
System Not Responding: Confirm the system switch is in the “heat” or “cool” mode. Check for error codes displayed on the screen and consult the manual for their meaning. If problems persist‚ a factory reset (see separate section) may resolve the issue. For complex problems‚ contact a qualified HVAC technician.
Factory Reset Procedure
Caution: Performing a factory reset will erase all personalized settings‚ schedules‚ and Wi-Fi configurations. This should be considered a last resort for resolving persistent issues. To initiate the reset‚ navigate to the settings menu on your Honeywell Pro 8000 thermostat.
Select “Reset” or “Factory Defaults” (the exact wording may vary slightly). You may be prompted to confirm your decision. Follow the on-screen instructions carefully. The thermostat will power cycle and return to its original‚ out-of-the-box state.

After the reset‚ you will need to re-establish your Wi-Fi connection‚ set the date and time‚ and reprogram your desired heating and cooling schedules. Refer to the “Initial Power-Up and Setup” and “System Configuration” sections of this manual for detailed instructions. Ensure you have your network password readily available. A successful reset restores the thermostat to its default operational parameters.